One Ableton setting
Choose the helper once in Ableton Settings.
Install the small Ableton helper, select it once in Settings, and RadialOS is ready to use.
Choose the helper once in Ableton Settings.
Use your keyboard and mouse.
Your chosen tool opens where you are already working.
After that, arrange each wheel around the way you work.
RadialOS includes the small helper Ableton needs.
Select the helper in Ableton Settings. The exact option is shown below.
RadialOS finds the tools you can put on a wheel.
Add up to eight tools, hold the wheel key, and release over a slot to load it.
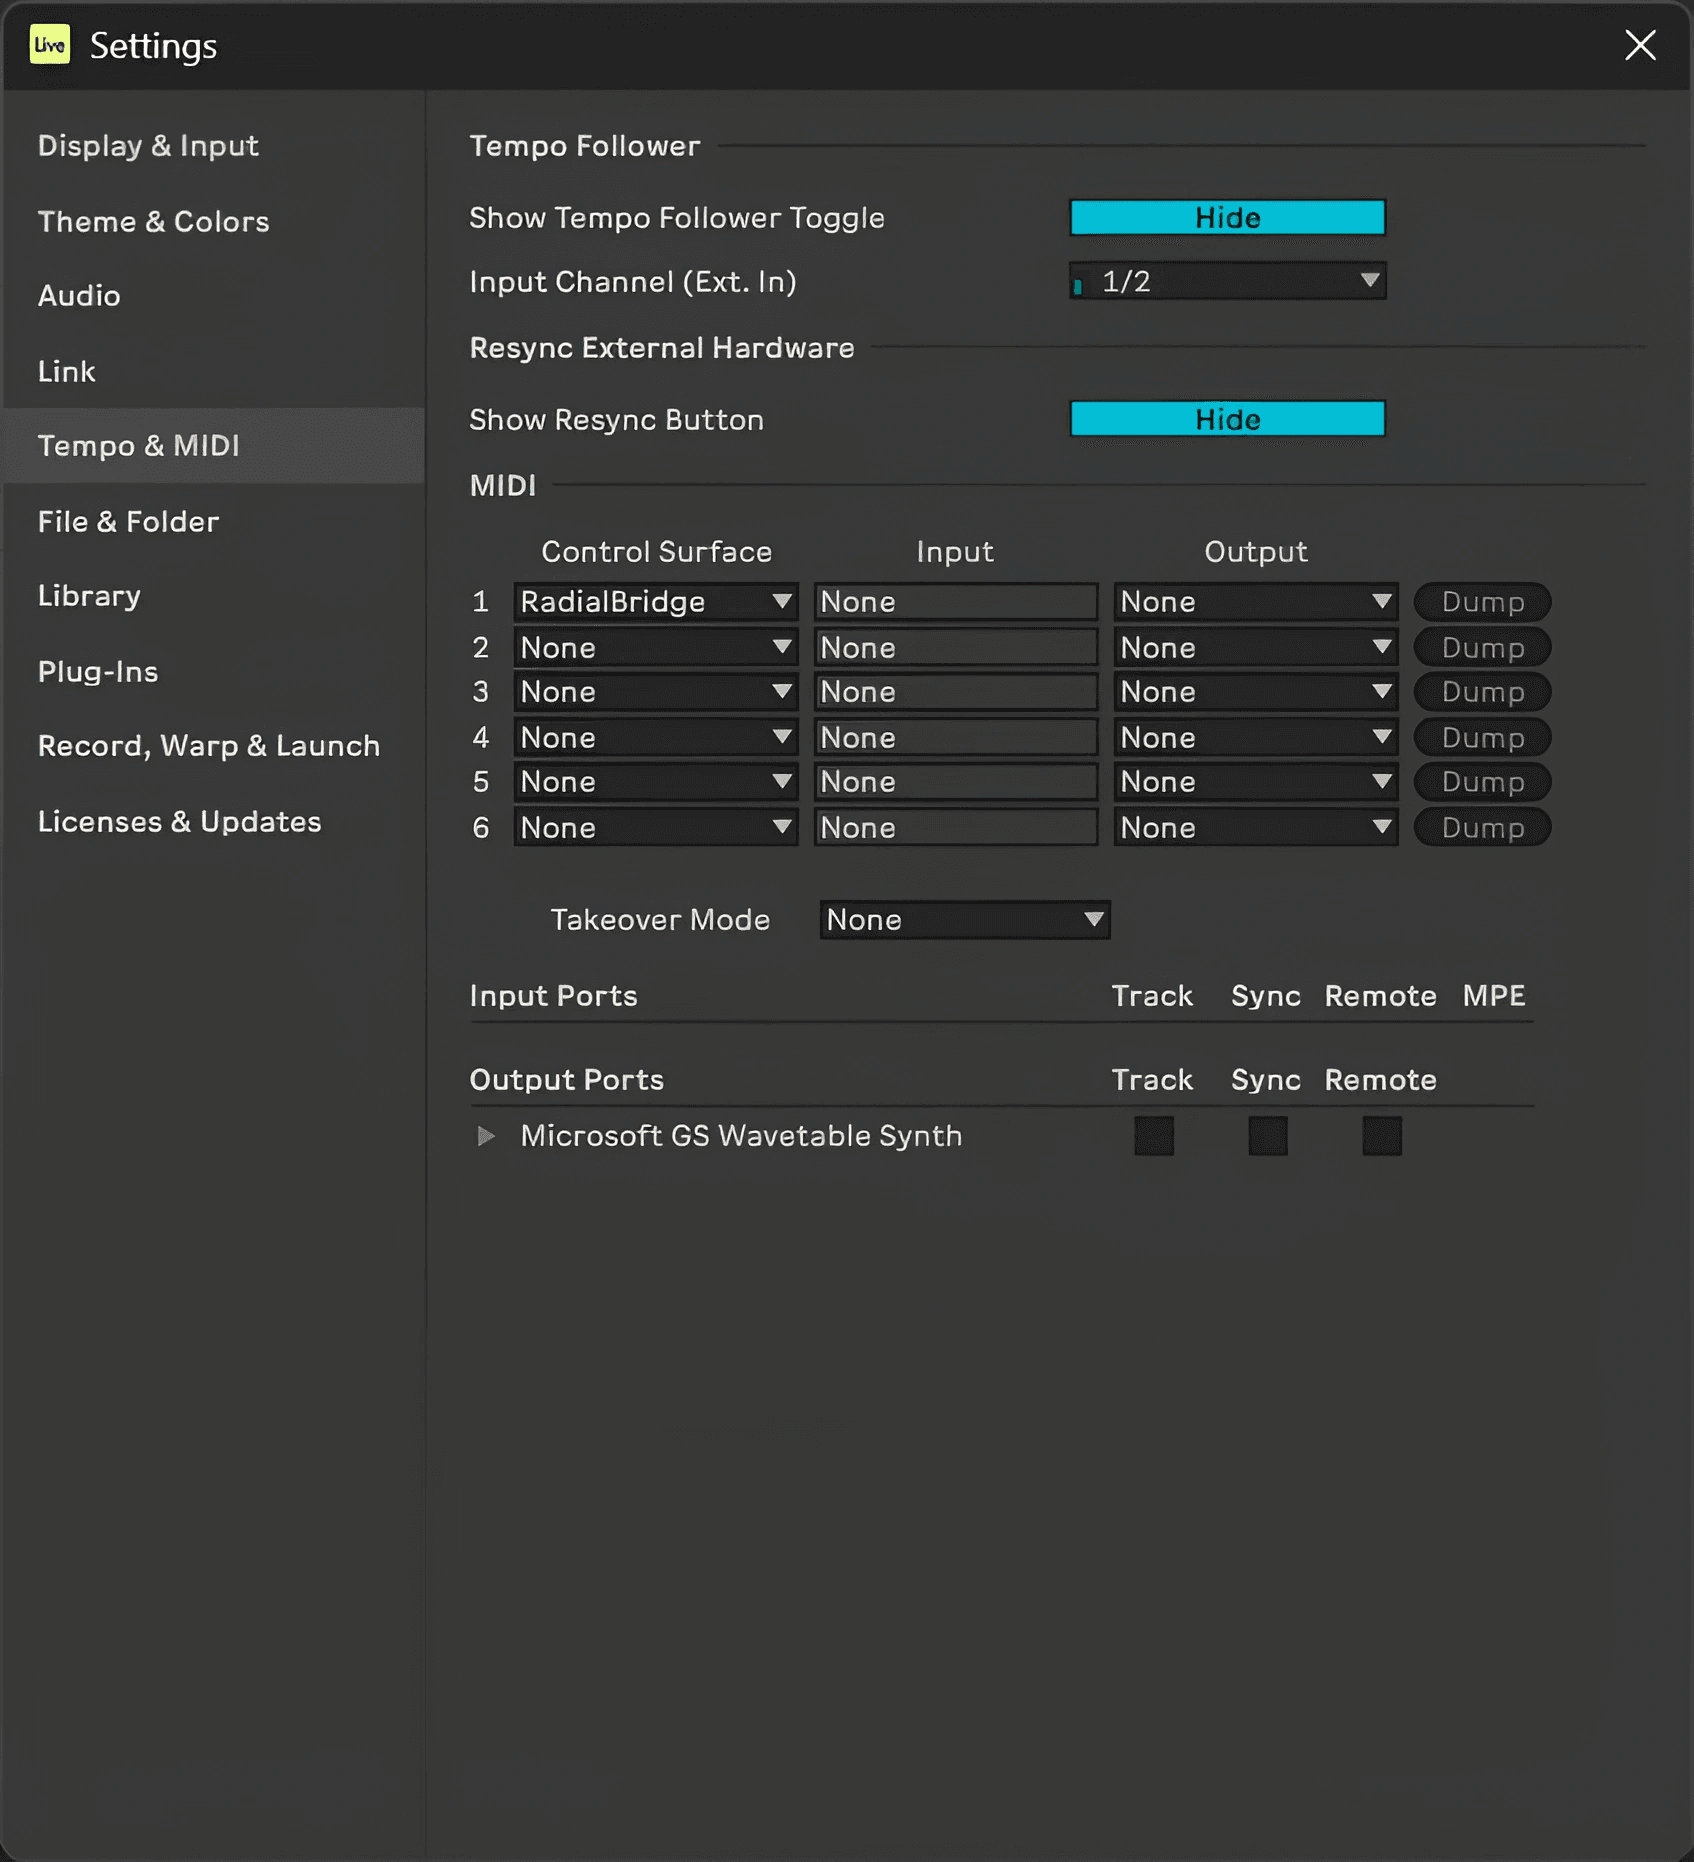
Open Ableton Settings and choose RadialBridge in a Control Surface row. RadialOS can then scan your browser and load supported tools from a wheel.
Build a wheel and launch a tool.
Drag a tool from the catalog into the slot where you want it.
Open the wheel, point to a slot, and release to load it.
Install once, then arrange RadialOS around the way you work.
Buy RadialOS